Vacuum Bagging
Vacuum Bagging is a technique used to reduce the weight and increase the strength of composite panels. When laminating any voids, air pockets dry patches or areas with excess resin will act as weak spots in the structure, by consolidating the laminate while it is curing these problems can be reduced and a stronger laminate stack will result. It is possible to build the laminate lighter as due to the extra strength you could use less material. Typically when wetting out too much resin will be used so as to avoid dry spots, when consolidating with vacuum pressure it is possible to use a cloth to absorb the excess resin which is then removed, leaving a lighter more consistent structure.
Atmospheric pressure normally acts on all sides of an object so it is often ignored, however by removing the air from the bag the atmospheric pressure will only press against the outside of the bag forcing it against the laminate with the weight of the atmosphere. One atmosphere is 14.7 pounds per square inch or 1.033 Kg Force per square centimetre. So if you could pull a perfect vacuum you would have the equivalent of a bag of sugar pressing against each square centimetre of the laminate while it is curing, something that would be difficult to achieve with clamping over a large area. In practice you are only likely to get a differential pressure of 0.7 to 0.8 of a bar but that would still be 700 to 800 grams per square centimetre which is quite significant. If you want to get more than that you have to get quite high tech and increase the pressure outside the bag, this is done by putting the laminate in a pressurised autoclave with the bag venting to the outside, not something to be found in most garages.
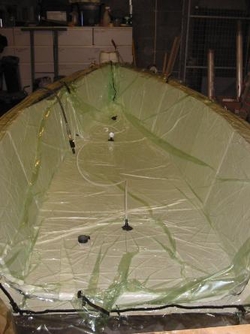
One of the most important things to get right is the sealing of the bag, any leaks will mean that full pressure is not achieved and if the leak is in such a place that air is pulled through the laminate then the part will be ruined. The bag can be sealed round the edge of an airtight mould or it can be used to completely encompass the piece if you are working on something small. It is also important to ensure that the bag does not bridge any sections of the mould, on a flat surface or convex shape this is easy but on a concave shape you need to be careful to ensure that there is enough slack in the bag to go into all the corners and that excess bag material is bundled up into pleats with all edges sealed.
Equipment
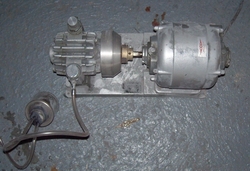
- Vacuum Pump
- Vacuum Bag
- Tube from pump to bag
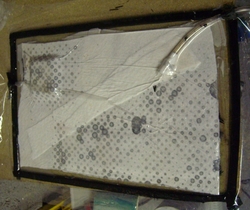
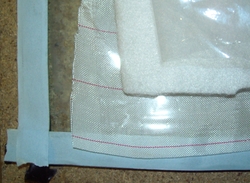
- Tacky Tape – Very sticky putty that is supplied in a roll of tape it sticks the bag to itself and to the mould you are working on
- Breather Fabric – A soft absorbent material much like a blanket, it provides a path for the air to escape to the vacuum port and will absorb any excess resin.
- Bleed Film – A thin plastic film with loads of small perforations through it, it allows the air and the resin to escape from the laminate stack to the breather fabric, it also makes it easy to remove the breather fabric from the laminate.
- Peel Ply – Provides a good surface texture for future bonding and provides an extra path for the resin to escape the laminate stack.
- Vacuum port – this can be as simple as pushing the hose into the bag surrounded by tacky tape or a specific port that clamps onto the bag and has a connector for the hose
Optionally you can add
- Resin Trap – Placed in the line between the laminate and the vacuum pump, it will prevent any resin that enters the vacuum tube from reaching the pump and destroying it.
- Vacuum Gauge – Can be placed on the bag away from the vacuum port so you can check that you are getting good pressure across the entire bag.
- Non Return Valve – Stops air from entering the bag if the pump stops.
- Stethoscope – Used to listen to the bag and locate leaks
An Example Laminating a hull
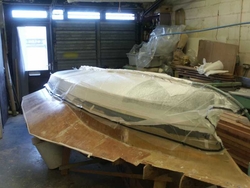
The mould should be built with a flange around the edge to stick the bag to and should be made from quite a thick laminate to try and ensure that there were no leaks through the mould structure itself. While we were wetting out the hull we protected the flange using masking tape so that we could remove any resin that dripped on to it.
The cloth was wetted out as normal and then a layer of peelply placed over the top, followed by the bleed film. The bleed film was tricky to place as it is quite slippery and it was difficult to keep it in place on the vertical sides of the hull. Corners were also difficult as we felt we needed to avoid having several layers on top of each other which might block the flow or air and resin. With the Bleed film held in place with some masking tape the bleeder cloth was added over the top, ensuring that we had an extra layer under where we were planning the vacuum port and running the length of the hull to provide a path for the air to escape. The masking tape around the flange was then removed and tacky tape stuck down ready for the bag. When fitting the bag big pleats were needed at the bow and around the transom to allow the bag to conform to the contours of the hull. Where you have a sharp internal corner like a chine and the bag or any of the other layers are too tight it can bridge the corner and you do not get pressure in the corner. To avoid this the vacuum was pulled and released a few times allowing the layers to be moved about through the bag till everything was in the right place.
Vacuum Infusion
In Vacuum Infusion rather than use the vacuum to consolidate an already resin soaked laminate the dry cloth is placed in a mould, and the bag fitted and vacuum pulled. A port is then opened and resin flows in to the laminate. It looks like it is being sucked in to the laminate but it is actually pushed by atmospheric pressure.
The advantages of this are that you have unlimited time to position your reinforcement material, without being hurried by the resin cure time. The exposure to the resin is smaller as all you have to do is mix it and put it into a tub with a tube in it. The minimum amount of resin is used as it will only flow into the voids between the layers and there will be no pockets of air in the laminate. This tends to be more of an industrial process as controlling the flow of the resin to ensure that it gets to every corner can be tricky in a complex shape. To get the resin to flow you need an additional flow media as well as some additional pipe work to deliver the resin. Any holes or leaks in the bag will totally ruin the part.
Video
Gavin Sims, Simon Goodwin and Simon Turnbull have been busy in Wales doing bits for Mango Jam (2682) and Strangely Brown (2651). They did the vac-bagging and took the photographs, and Daryl Wilkinson made the video
